User Management & Access Control [TBD]
7.1 Overview of User Management in HISPMD
The Health Information Systems Performance Monitoring Dashboard (HISPMD) features a robust User Management and Access Control system that ensures secure access to health data while allowing role-based permissions for different users. This module is critical for maintaining data security, integrity, and accountability within the system.
Getting used to User Profile
Your User Profile Consists of the following features and functionalities.
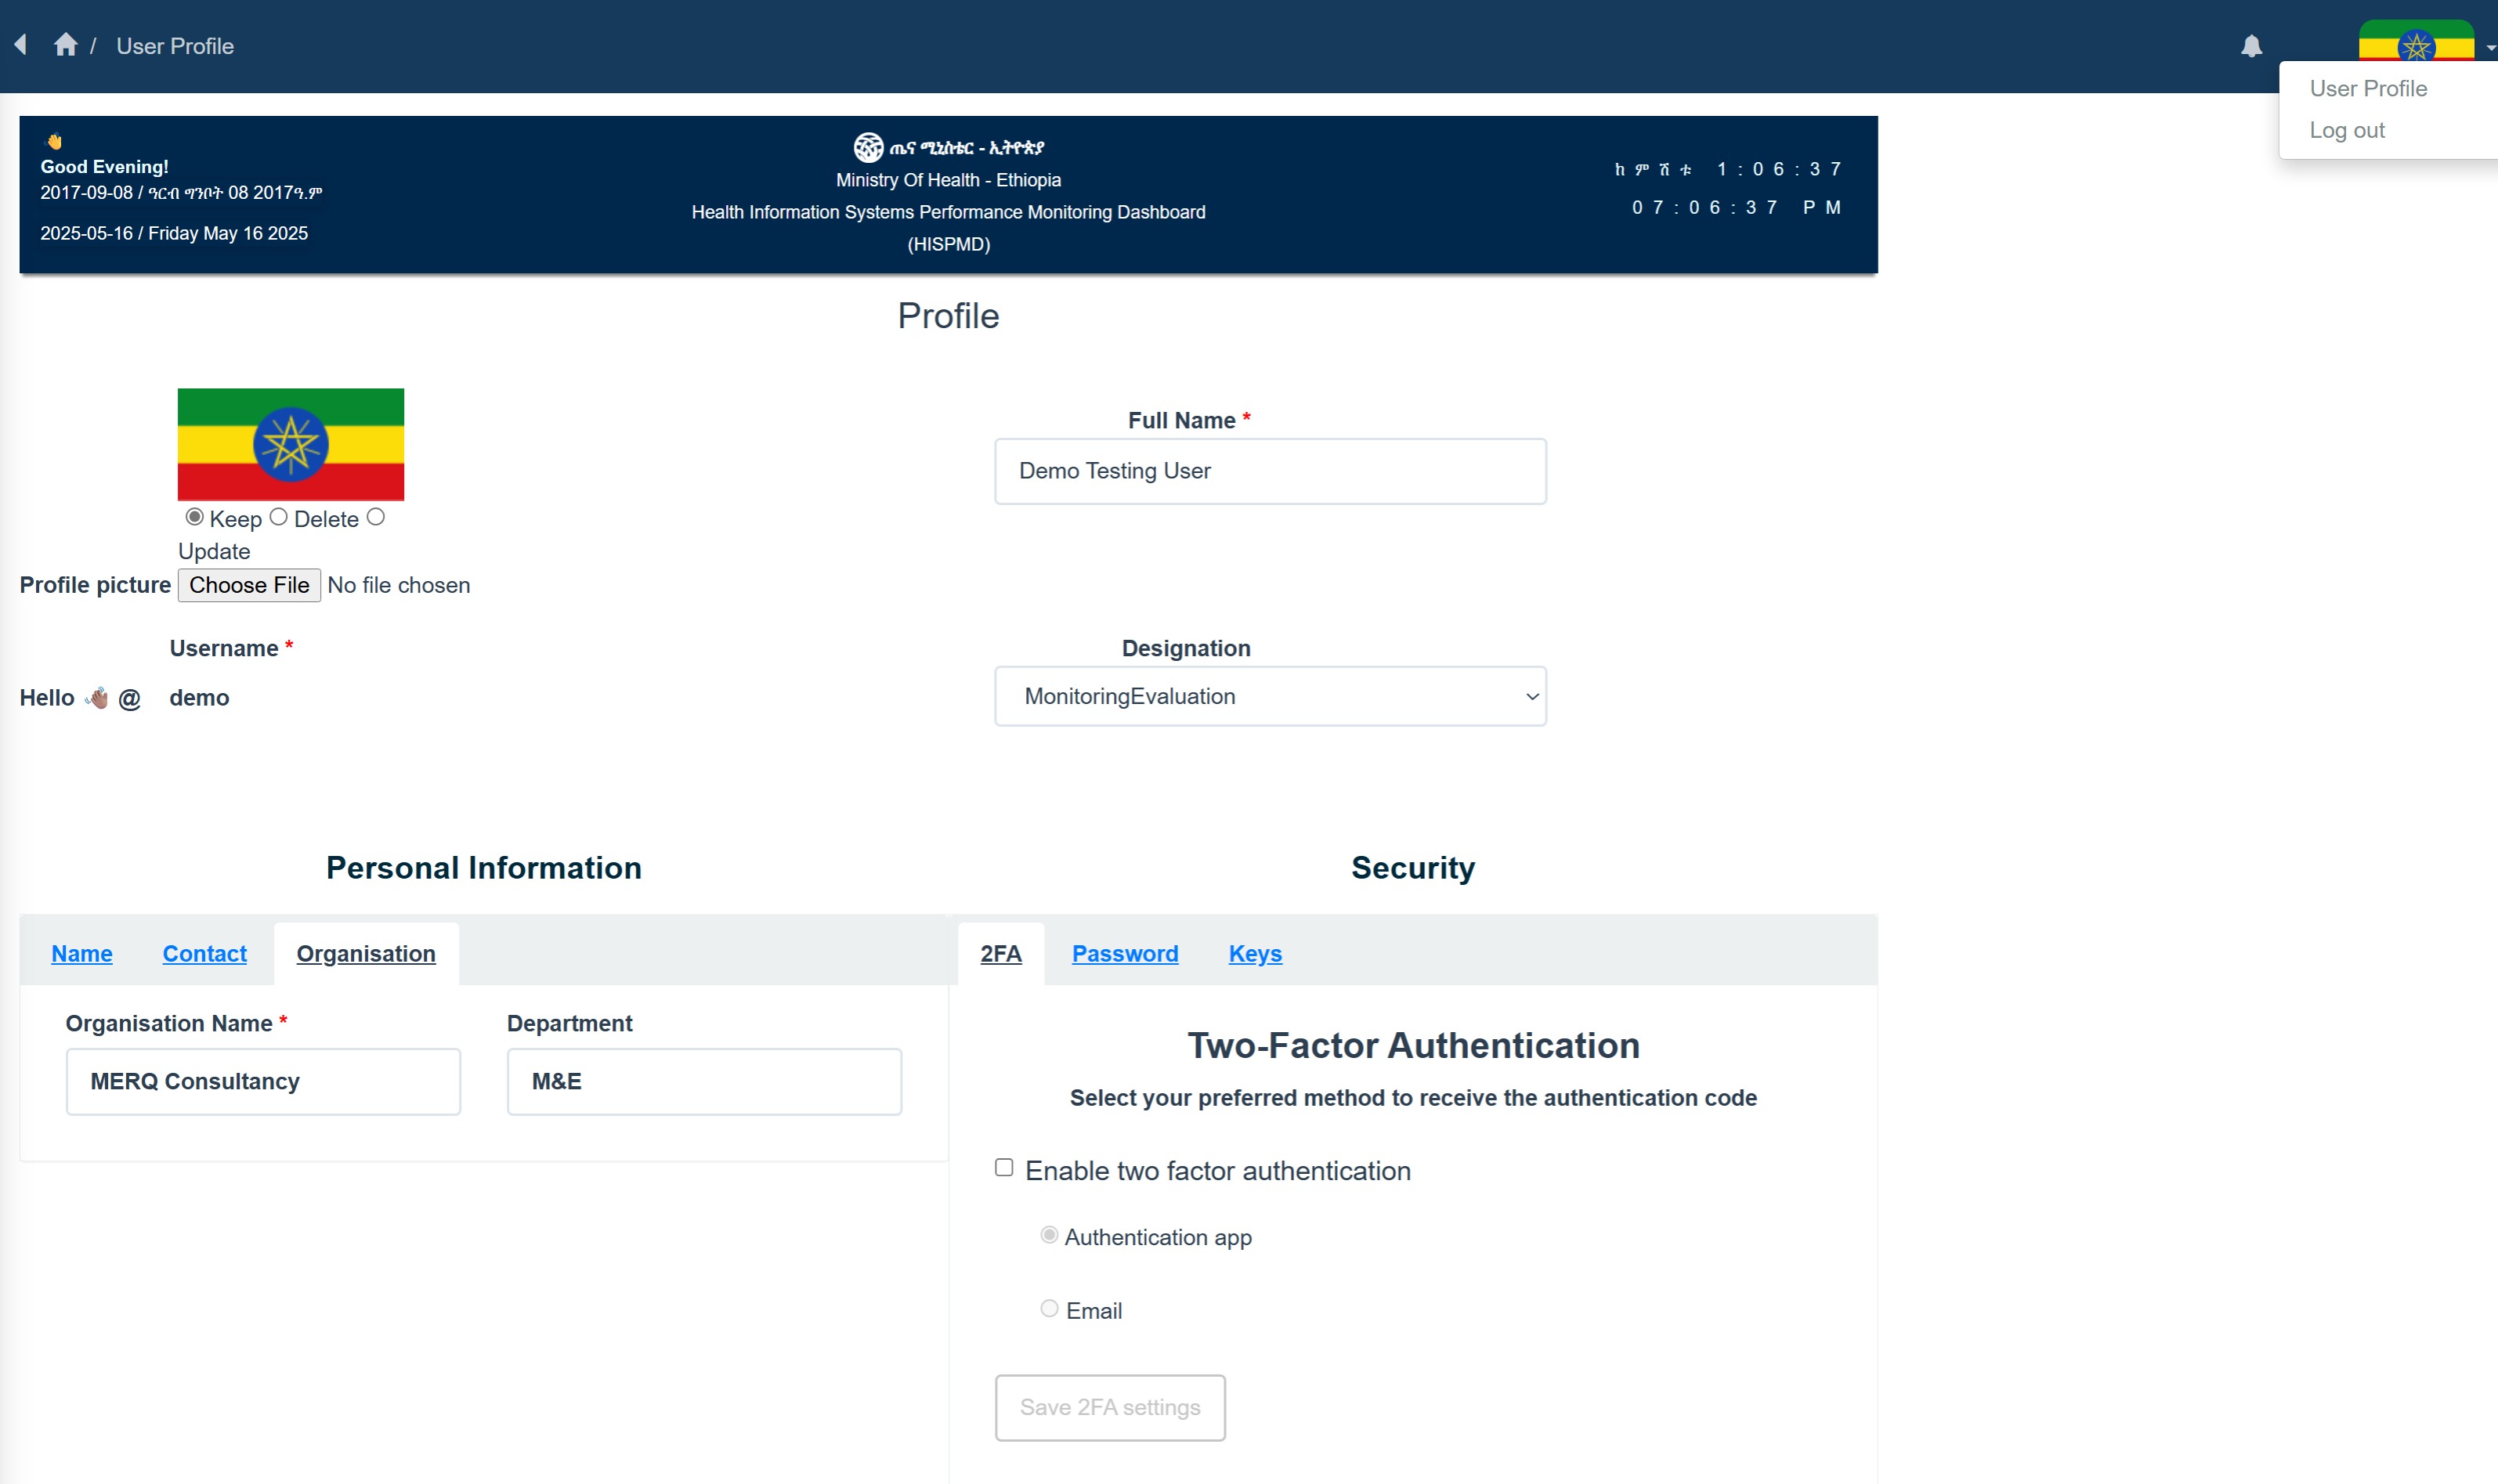
Figure 7.1: Overview of User Profile
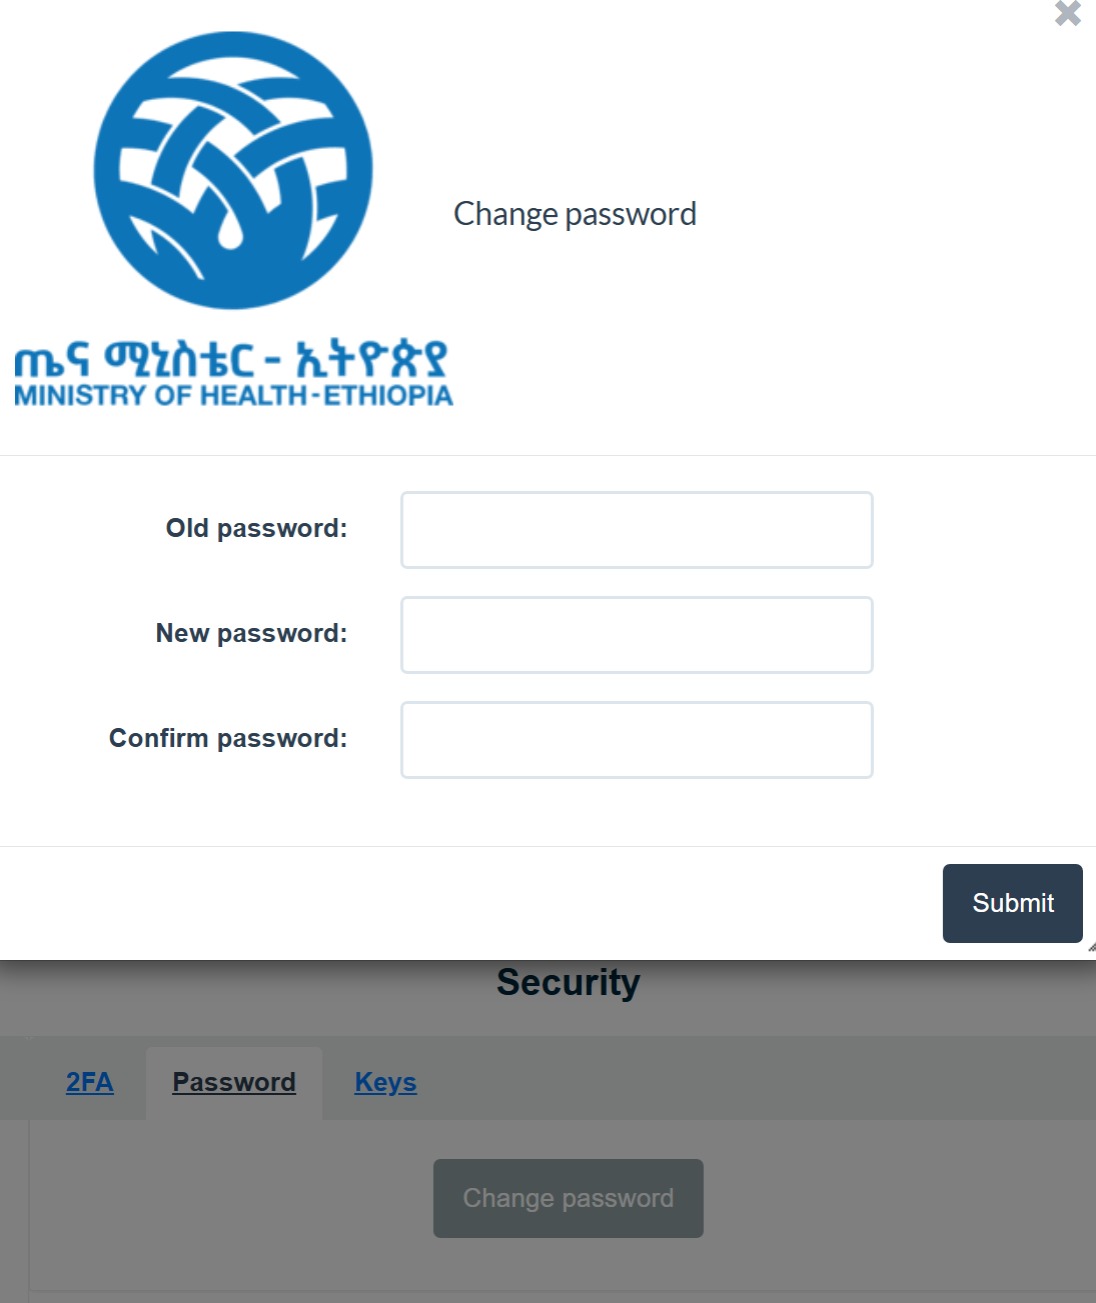
Figure 7.2: Changing Password
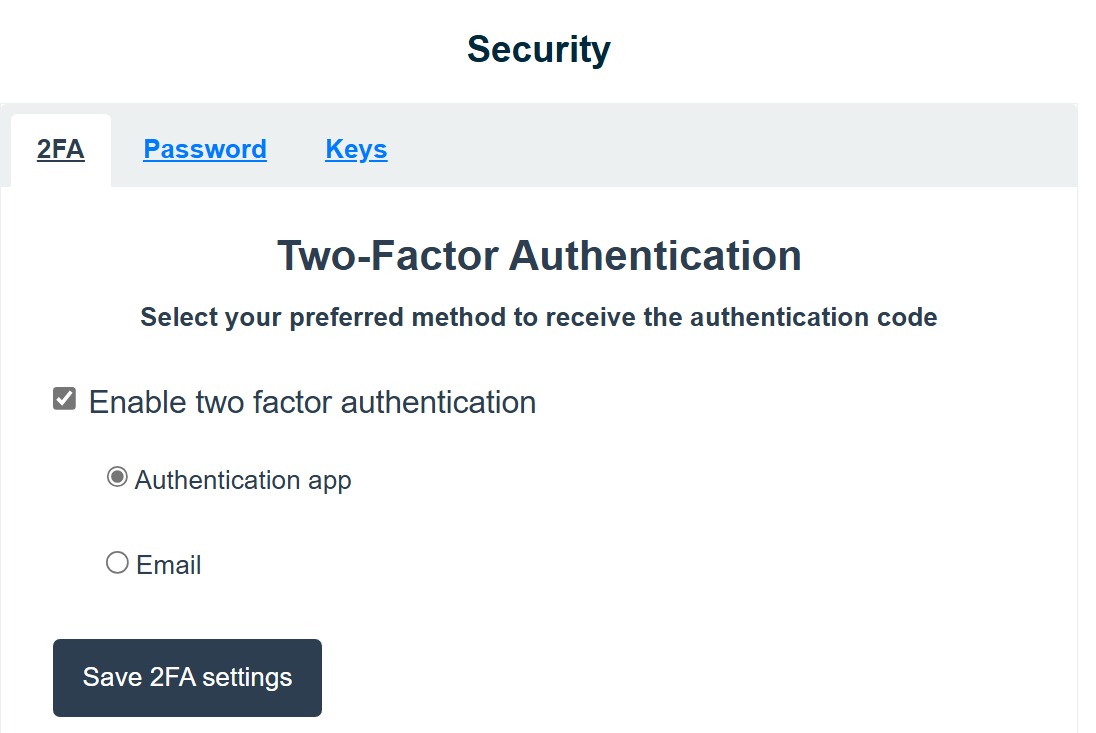
Figure 7.3: 2FA (Two Factor Authentication)
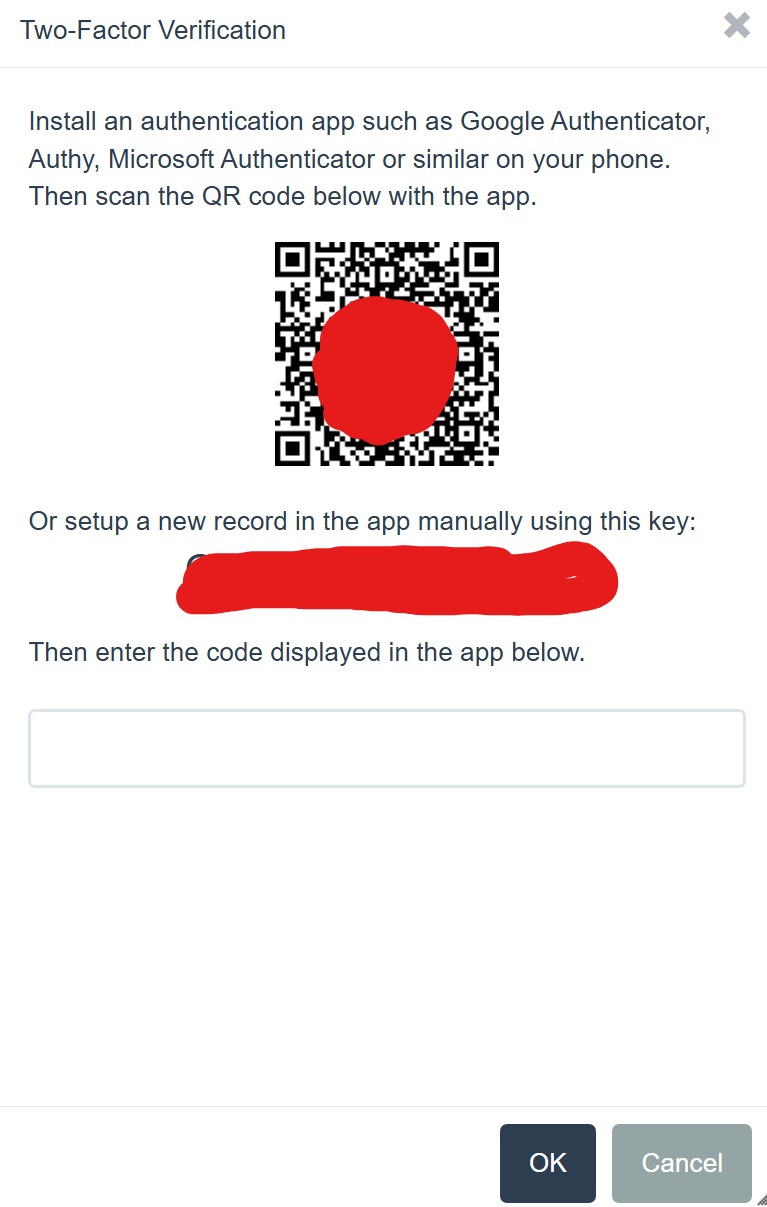
Figure 7.4: 2FA (Setting Authenticator Application)
Key Features of User Management in HISPMD
- Role-Based Access Control (RBAC): Restrict access to sensitive data based on user roles.
- User Authentication: Secure login system using usernames, passwords, and multi-factor authentication (MFA).
- User Activity Monitoring: Track user interactions with the system.
- Permissions Customization: Assign specific rights to different user groups.
- Audit Trails & Logging: Maintain records of user activities for accountability.
7.2 User Roles and Permissions
HISPMD operates on a Role-Based Access Control (RBAC) model, ensuring that users only have access to data and functionalities relevant to their role.
7.2.1 Standard User Roles
| Role | Description | Permissions |
|---|---|---|
| Administrator | Full control over system settings, users, and reports. | Create, edit, delete users; manage permissions; configure system settings. |
| Data Manager | Manages data entry, processing, and validation. | Add, edit, delete health data; validate data integrity. |
| M&E | Analyzes data trends and generates reports. | Access and export datasets; create custom reports; apply filters. |
| Default (Read-Only) | Can view dashboards and reports but cannot modify data. | View reports and analytics; no editing or exporting permissions. |
| Regional Manager | [TBD] | Oversees data from a specific geographic area. |
| Facility Staff | [TBD] | Inputs and verifies health data at a facility level. |
🚀 Example: A Data Manager can upload and correct data, while a Viewer can only read and analyze reports without making changes.
7.3 Managing Users in HISPMD
System administrators have full control over user creation, editing, suspension, and deletion.
7.3.1 Adding a New User
To add a new user: 1. Navigate to User Management in the Admin Panel. 2. Click Add New User. 3. Enter the user's full name, email, username, and phone number. 4. Assign the appropriate role (Administrator, Analyst, etc.). 5. Set a temporary password (users can reset later). 6. Enable or disable multi-factor authentication (MFA).
📌 Note: New users receive an email notification with login credentials.
7.3.2 Editing User Information
To modify a user's details: 1. Go to User Management. 2. Click on the user's name. 3. Update email, role, or permissions. 4. Click Save Changes.
7.3.3 Deactivating or Deleting a User
- Deactivation: Temporarily restricts access without deleting the account.
- Deletion: Permanently removes the user and their access rights.
Steps to Deactivate a User:
- Navigate to User Management.
- Select the user to deactivate.
- Click Disable Account.
Steps to Delete a User:
- Open the user profile in User Management.
- Click Delete User and confirm.
📌 Note: Deleted users cannot be recovered. Use deactivation for temporary restrictions.
7.4 Setting User Permissions
HISPMD allows granular control over user permissions.
7.4.1 Customizing Permissions for User Roles
Admins can customize access levels for specific roles.
Example Permissions Customization:
| Feature | Administrator | Data Manager | M&E | Default |
|---|---|---|---|---|
| View Dashboard | ✅ | ✅ | ✅ | ✅ |
| Edit Data | ✅ | ✅ | ❌ | ❌ |
| Generate Reports | ✅ | ✅ | ✅ | ❌ |
| Export Data | ✅ | ✅ | ✅ | ❌ |
| Manage Users | ✅ | ❌ | ❌ | ❌ |
| Configure System Settings | ✅ | ❌ | ❌ | ❌ |
✔ Example: An Administrator can manage users, but an Analyst can only view and analyze data.
7.5 Security & Authentication
HISPMD employs strong security measures to protect user accounts.
7.5.1 Multi-Factor Authentication (MFA)
- MFA adds an extra layer of security by requiring a second verification step.
- Can be enabled for all users or for specific roles (e.g., Admins).
- Supported methods:
- Email-based OTPs
- SMS verification codes (N/A)
- Authenticator apps (Google Authenticator, Microsoft Authenticator)
How to Enable MFA:
- Navigate to Security Settings.
- Click Enable MFA.
- Choose a verification method (Email, SMS, Authenticator App).
- Users must verify during login.
7.5.2 Password Policies
HISPMD enforces strong password policies to prevent unauthorized access.
- Minimum 8 characters, including uppercase, lowercase, number, and symbol.
- Mandatory password reset every 90 days.
- Failed login attempt lockout after 5 incorrect attempts.
📌 Tip: Users can reset passwords via "Forgot Password" on the login page.
7.6 Monitoring User Activity
Admins can track user activity logs to detect suspicious behavior.
7.6.1 Viewing User Logs
- Navigate to Audit Logs in the Admin Panel.
- View timestamps, login history, data changes, and report downloads.
- Export logs for security audits.
🔹 Example: If a user exports a large dataset, admins can review audit logs to verify compliance.
7.7 Best Practices for User Management
| Best Practice | Why It’s Important |
|---|---|
| Use Role-Based Access Control (RBAC) | Prevents unauthorized access to sensitive data. |
| Enable Multi-Factor Authentication (MFA) | Adds an extra layer of security. |
| Regularly Audit User Activity | Detects and prevents security breaches. |
| Enforce Strong Passwords | Protects against brute-force attacks. |
| Deactivate Inactive Accounts | Reduces security risks. |
7.8 Summary of User Management Features
- Role-Based Access Control ensures secure access.
- User Authentication & MFA protect accounts.
- Granular Permissions allow customized user access.
- Audit Logs track user activities.
- Security Features prevent unauthorized access.
By effectively managing users in HISPMD, organizations can maintain data integrity, enhance security, and improve accountability in health performance monitoring.
7.8.1 Assigning a User to a Role and Group
An administrator can go to the Admin Area and click on Assign users to groups. - Select a user and check mark on the desired role and assign a role/group to a user.
📌 Next Section: Learn how to configure system settings and integrations in System Administration & Configuration. 🚀